Handprint Clown


Handprint Clown


Materials Needed:
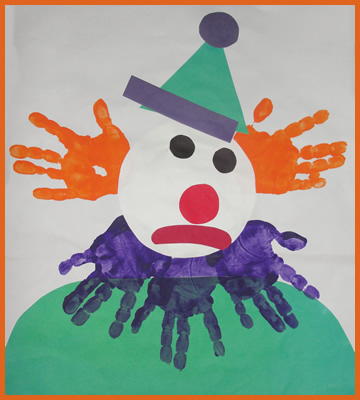
Construction paper (white, green, red, black, and purple)
 Paint (orange and purple)
 Scissors
 Glue

 Shapes template


What to Do:

  Cut out the large circle from the shapes template and trace onto center of white construction paper.

 Paint child’s hands orange and assist with placing hands with thumbs pointing up on two sides of the circle. 
 Using the green construction paper cut out shirt shape. (See example picture above.)

Instruct children to glue clown’s shirt to the bottom of the white construction paper below the clown’s head.
  Paint child’s hands purple and assist with placing below circle with fingers pointing down. Repeat three times in a row to create a collar.
 Using the shapes template, trace the rectangle and the small circle on purple paper and cut out.
  Using the shapes template, trace the triangle pattern onto green paper and cut out.
Instruct children to:

- Glue larger white circle over traced area between hands, overlapping hands slightly.

- Glue the green triangle to the top of the head, glue the purple rectangle to the bottom of the triangle, and then glue the purple circle to the top of the triangle.
- Glue two black circle eyes on the clown’s face, a red circle nose, and an elongated red oval to use as the clown’s mouth.


[ Back ]  [ Send to a friend ]  [ Print Preview ]


Comments
Be the first to leave a comment! (Note: You must be logged in to leave a comment.)